Eye Contact Camera Mod
I wanted to bring my old webcam to centre screen for better video calls
There are already a few products being brought to market after this niche formed during the pandemic lockdown and video calls became the norm. Essentially, a small camera is suspended on an arm that sits in the middle of your laptop screen or monitor, so you have your call around it, and the recipients feel you’re looking at them instead of above/below them.
The problem for me was that the products were expensive, and I had an old Logitech C270 lying around and thought why not put it on a stick?
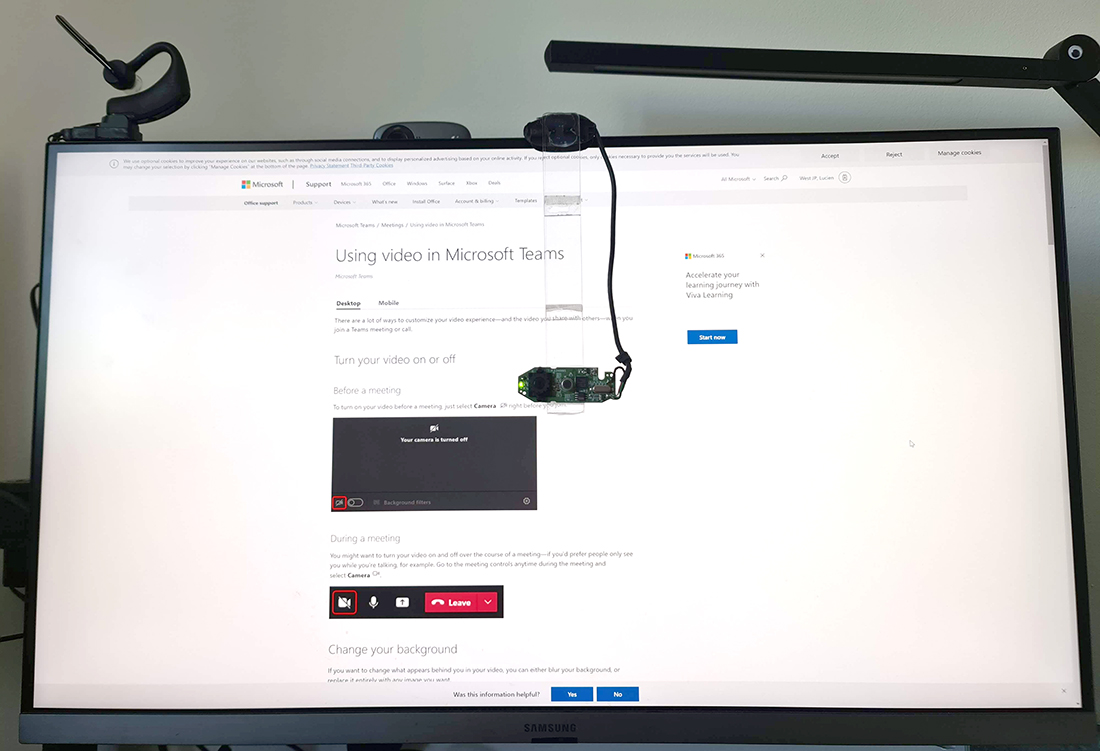
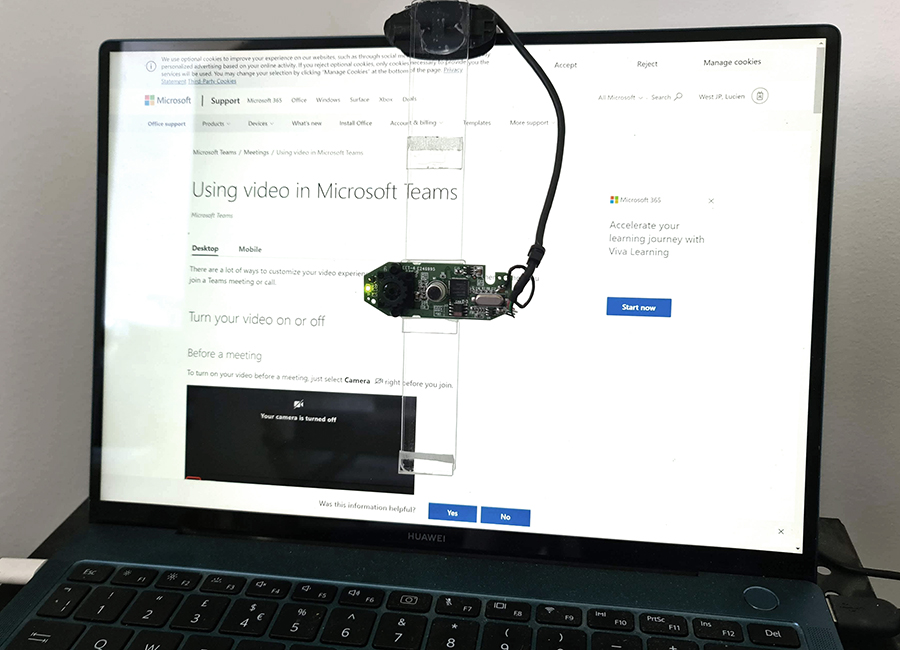
I decided to make the mount out of acrylic/perspex as it would allow me to see through it to talk to people and use the screen, and I also wanted options for heights and left/right positioning so if someone shared their screen, I could move it out of the way a bit. Finally, I wanted to ability to use it on my desk-mounted monitor or my laptop screen.
Build
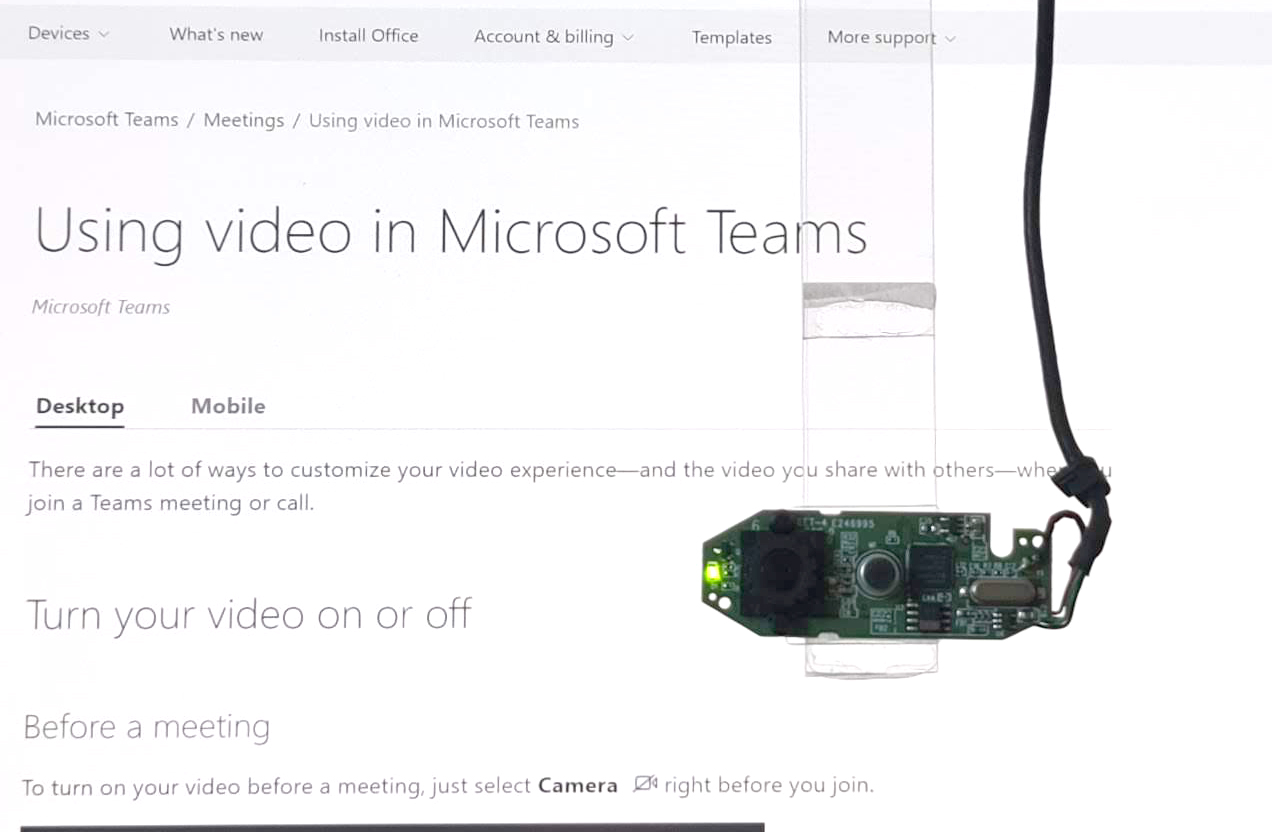
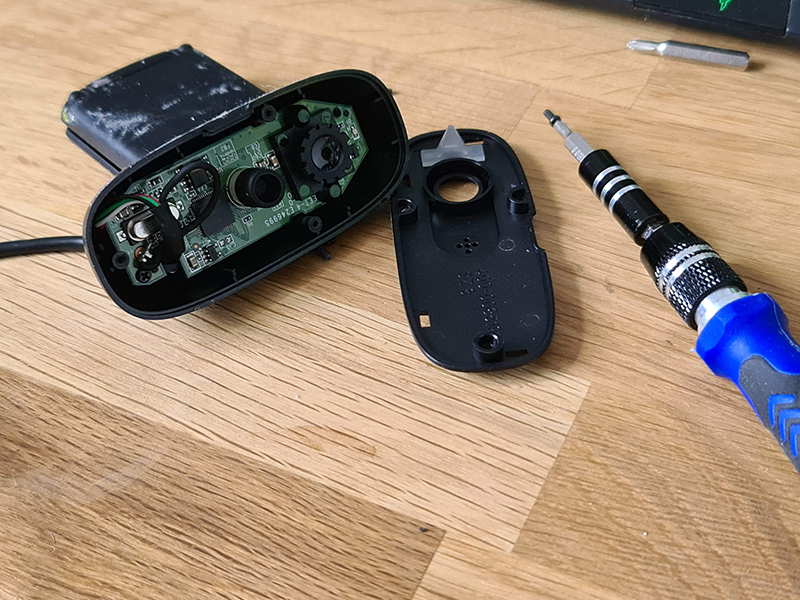
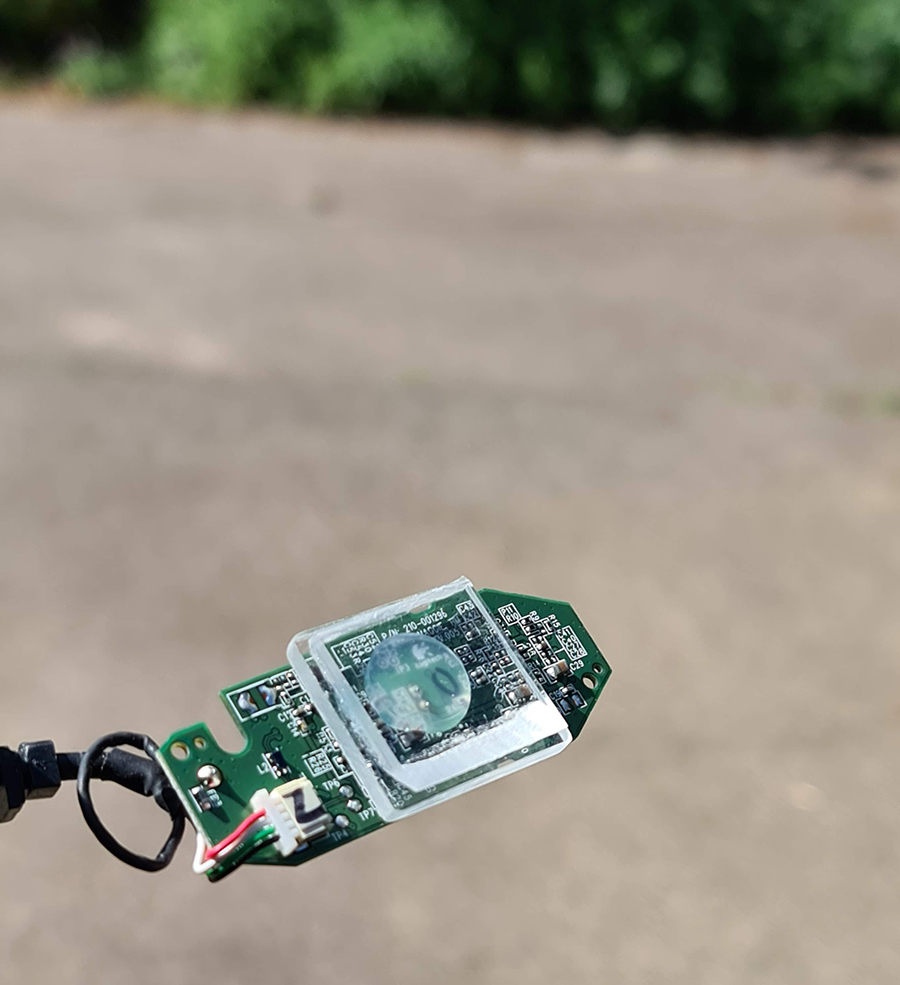
So first thing was to open up the camera and see how big the insides were to see if it would be worth ditching the case - which it was, saving about a centimetre in width and 8mm in height.
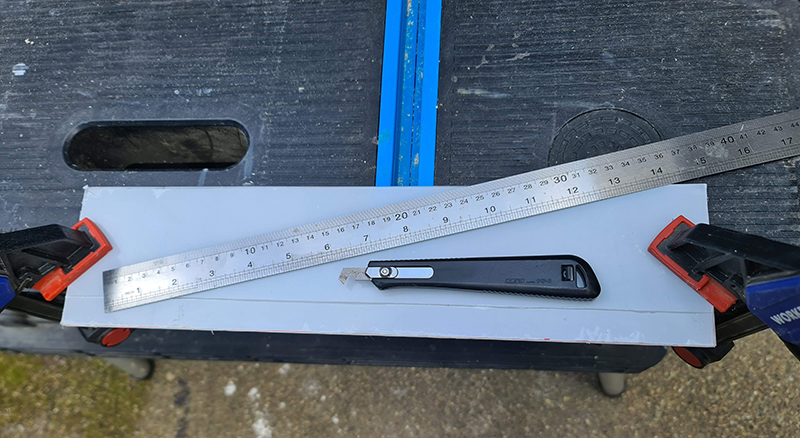
Next, I started scribing acrylic, the same process as I used for the smart mirror mirrored acrylic. I snapped off a 2cm strip and divided it into a 17cm piece for the main arm, and then the remaining 15cm I used to make the camera mount and stages.
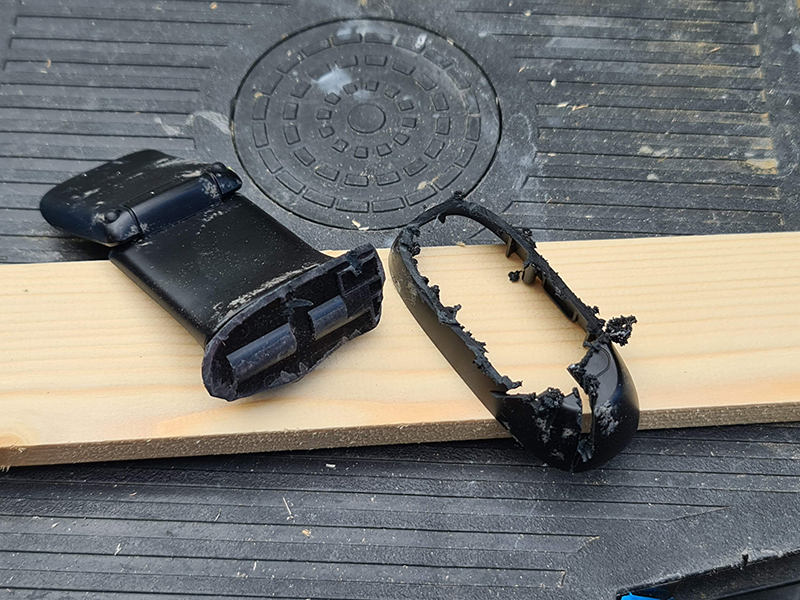
I found the clip that these cameras use to grip the top of the monitor well made, with a stiff 2-hinged system and a bit of weight to it, securing the camera to any thickness of screen. This was better than I could build, so I cut the shroud off the hinges with a dremel (fitted with a metal EZ-cut disk as it was all I had).
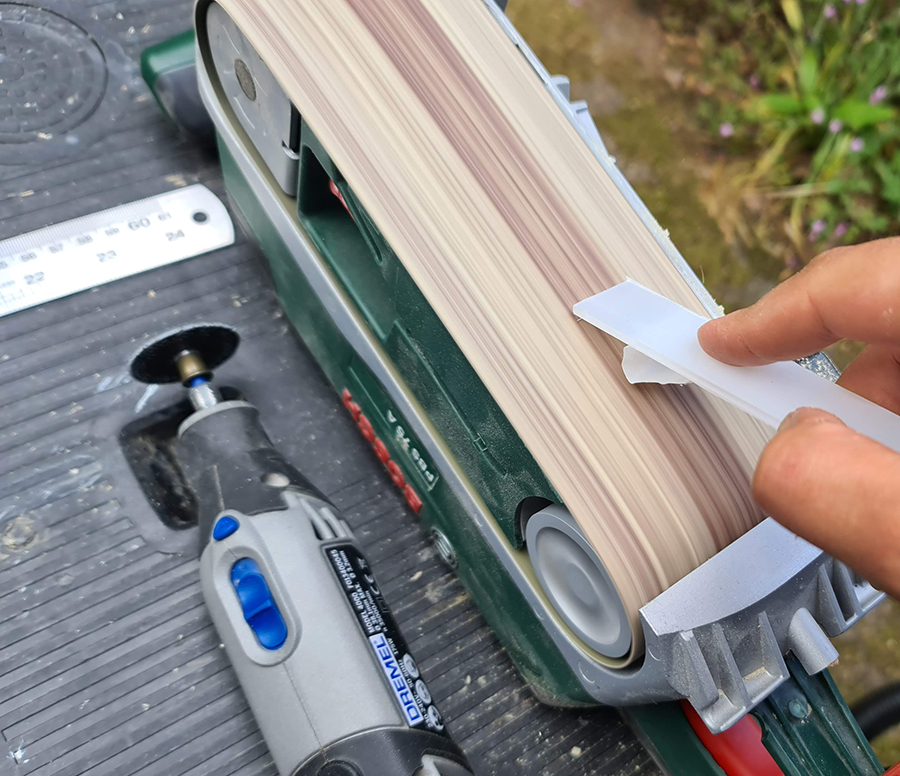
A french cleat seemed like a nice way to mount the camera at different levels, and I’d just been fantasising about lining my garage with them for tool mounting, so decided to try this in acrylic. To cut the ~45 degree angle, I clamped a belt sander to the bench and fed it acrylic strips, which rapidly sharpened the edge.
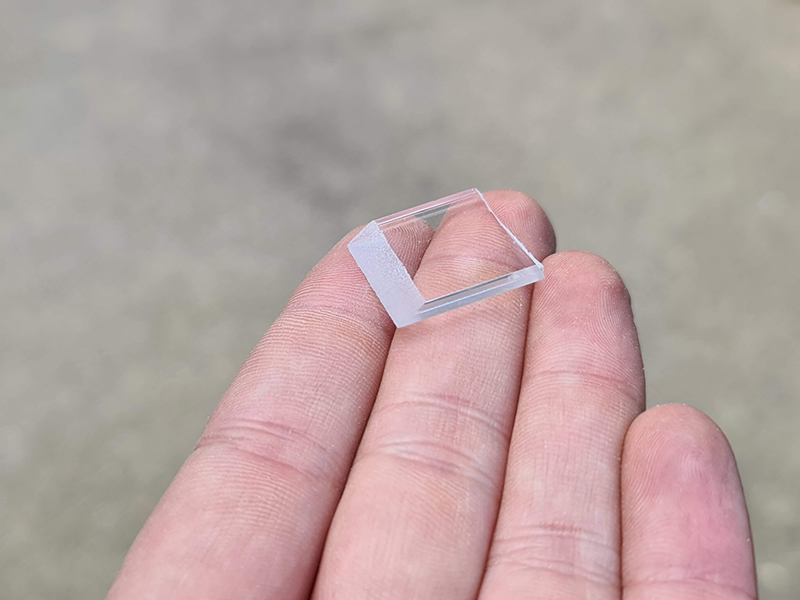
I then cut each section off with the dremel until I had a few of these little clear wedges.
I hot-glued the old camera hinge to the mount strip - not pretty, but accounted for the bumpiness of the clip header.

I then glued the cleats to the mount and one to a spacer and then to the camera. For acrylic to acrylic I used standard CA glue. I have some special acryclic solvent somewhere, but this was instantly set and dried mostly clear. The camera board I hot glued directly.
And that was it, took about an hour (and it probably shows). Not sure what to do about the wire which ruins the illusion - tempted to cut it off and solder the 4 used lines to thin copper wire to look a bit less obvious, but that can wait for another day.
It works pretty well, camera sitting centre-screen on both laptop and monitor using the different height options. The whole thing slides left and right nicely too and the hinge taken from the old camera also allows the whole thing to tilt.