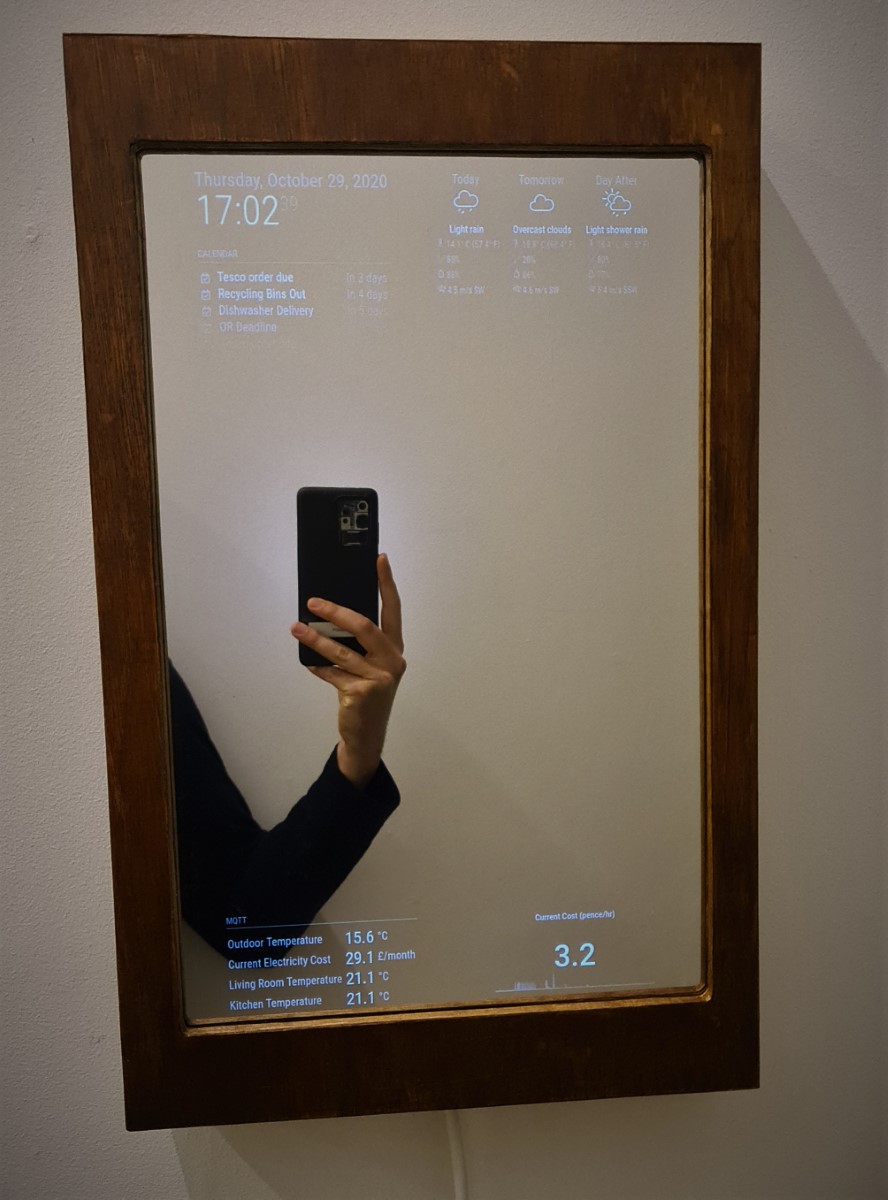
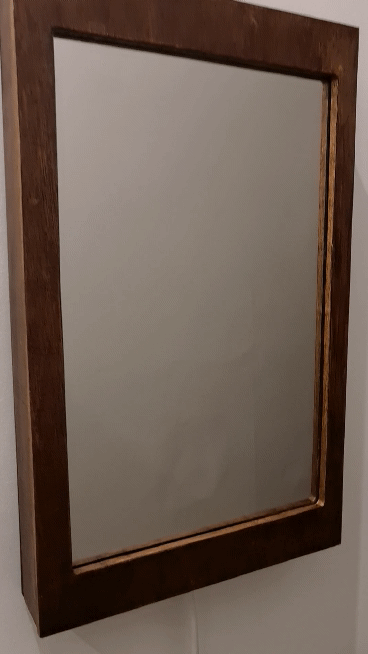
Smart Mirror
A nicer way for data display
I first came across the Magic Mirror project years ago, where people were posting all kinds of these ‘smart mirrors’ online and fancied the idea, but didn’t have much data to populate it with until recently. With the advent of my home automation network, I now have nodes gathering thousands of datapoints for temperature, lights, power, motion events, etc. This seemed the time to build the mirror to display some of this data, along with online sources (calendars, news, weather, etc.).
Parts used
- Raspberry Pi 3B+
- Dell 19” monitor
- Two-way mirrored acrylic
- PIR sensor
- 5V Fan
- Power transformer (240AC to 5DC)
- Wood ‘n wires
I have various old Pi’s lying around from old projects. I thought about using a Pi2, but I always had issues with WiFi dropout with a dongle, so the built in networking of the Pi3 was perfect. A pizero would also do, but can’t run the MagicMirror software itself and would need to serve it from an external server.
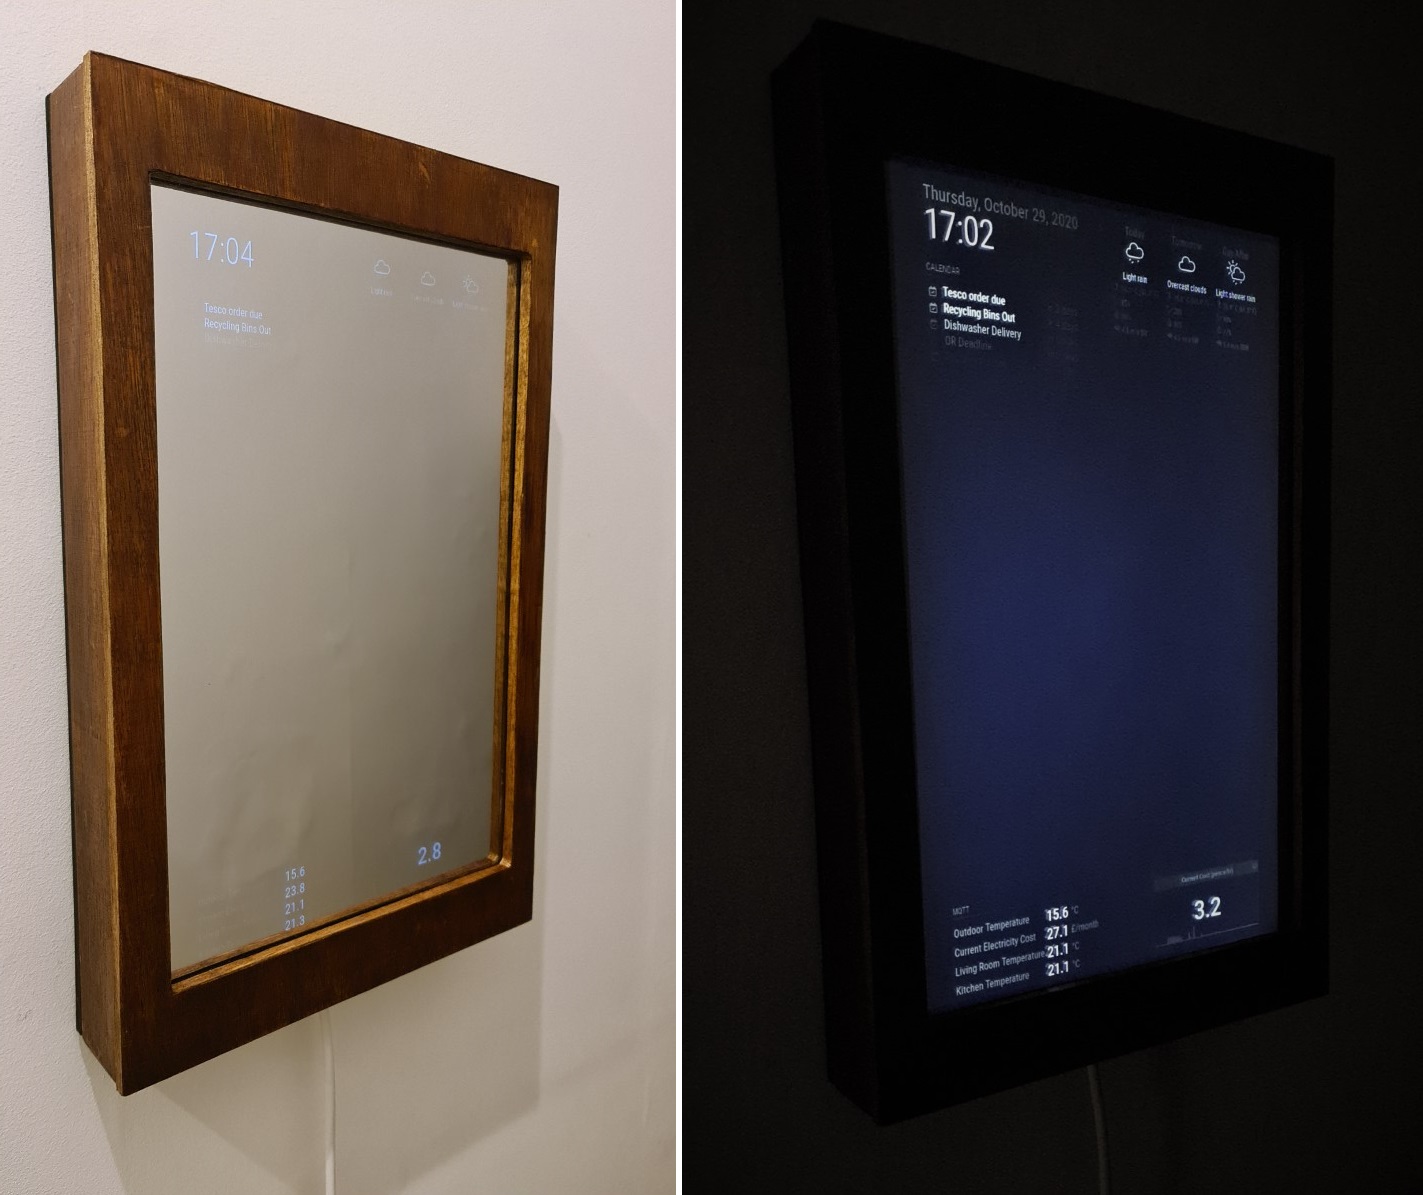
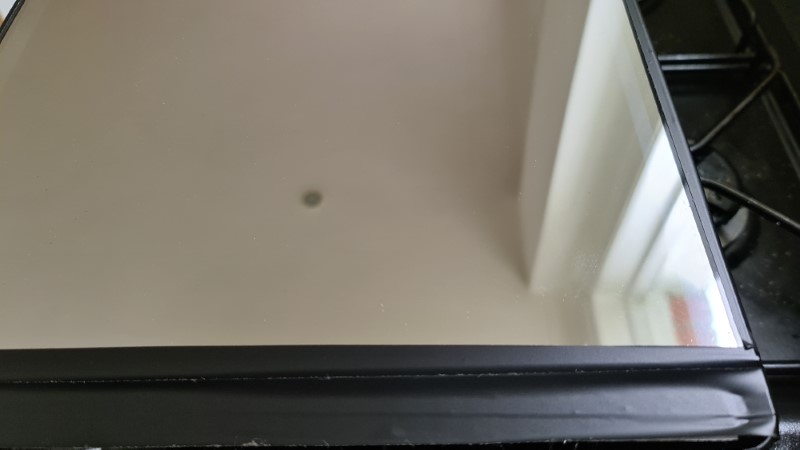
The mirror portion should be of the two-way variety. Contrary to popular belief, those mirrors in interrogation rooms are in fact two-way, not one-way. They simply allow the brighter room to be visible and the darker room to be mirrored. This works in the smart mirror approach as we assume the monitor backlight will be the brightest thing in the frame. I used a piece of mirrored acrylic plastic from Amazon as it was about £15 instead of over a hundred for glass. But glass will provide a much better, less distorted reflection.
So basically, you build a box to hold the monitor, stick the acyclic to it and then have a Pi at the back connected via HDMI.
The Build
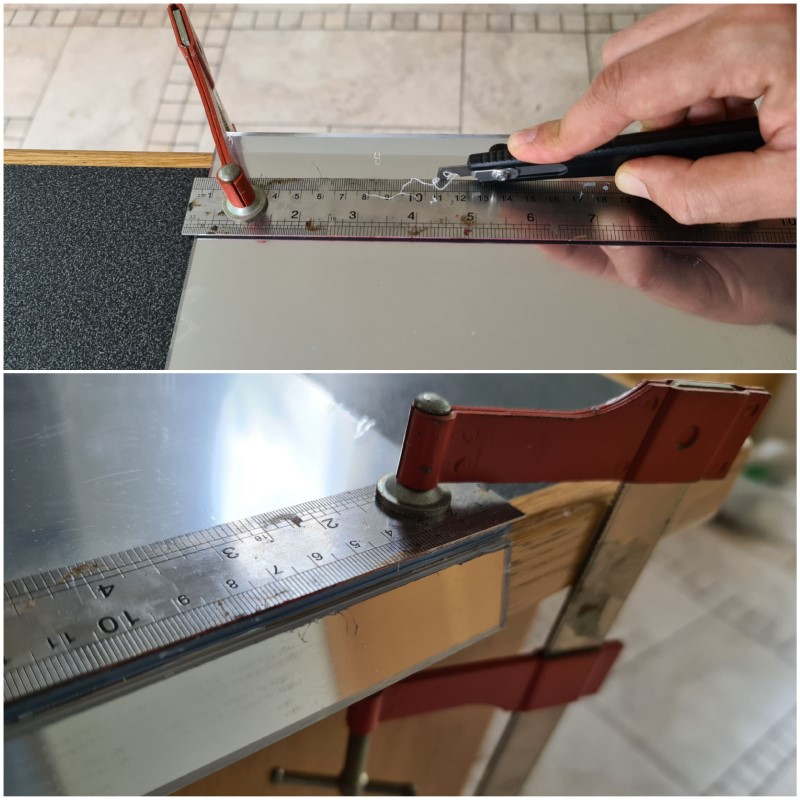
So I started with cutting my acyclic to size for the monitor. The best and cheapest tool I know of to cut straight acyclic is a ‘scriber’ which is like a hooked blade that you score the plastic with until you can just snap it.
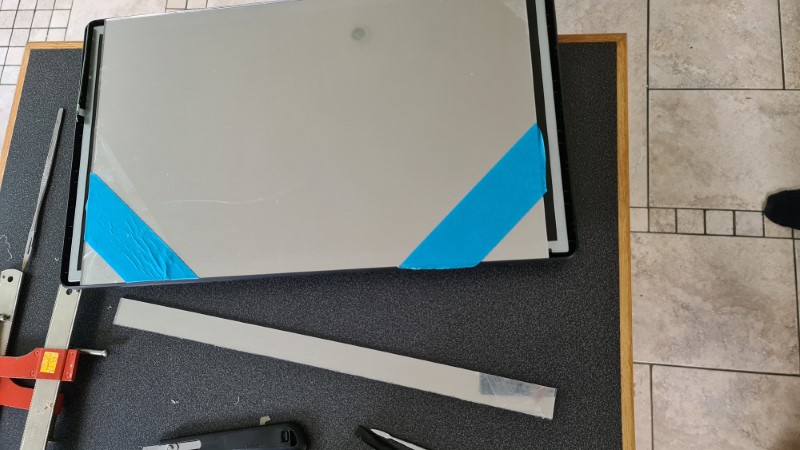
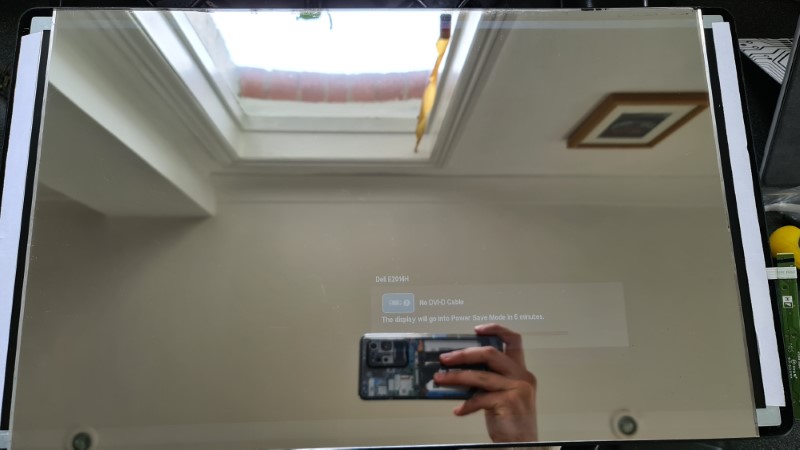
I then stuck it to the monitor with black electrical tape. As the monitor will appear diffuse the further away from the ‘mirror’ it is, I took the bezel off the monitor first.
A quick test everything was visible with the ‘no signal’ splash.
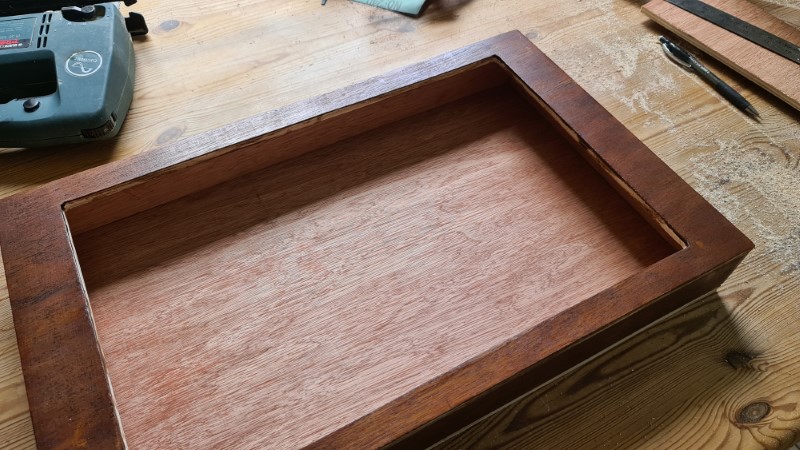
Woodwork.
I like the idea of wood but have little experience - so this was a good chance to learn.
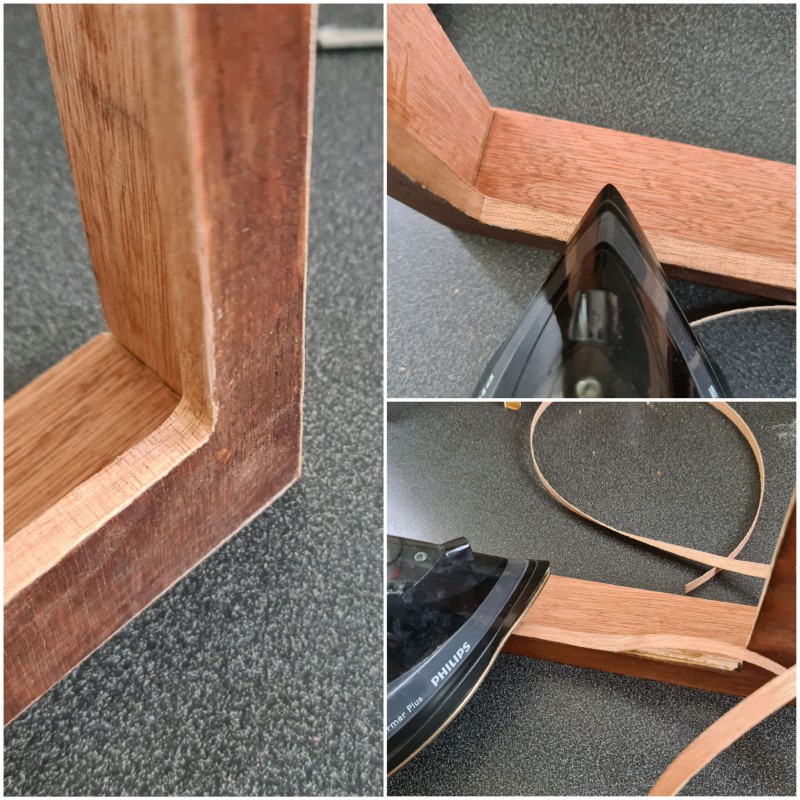
I bought a sheet of 0.9mm plywood as it has a stainable hardwood layer on the outside and the perpendicular grain in each layer allows cutting it in any direction while maintaining strength.
The only saw I used for this was an electric jigsaw, so I cut strips for the edges first. I wanted to try bevel cuts, so set the saw to 45deg and cut the ends into a wedge. Finally gluing it together to make ‘neat’ corners.

For the front, it was easier to cut a sheet the size of the monitor and just cut out the hole where the mirror would sit (i.e. not making a 4-part frame around it). This only really worked in wood as it was plywood, solid wood would most likely be too weak at the thin, tall edges. I glued this front panel edges and clamped for a few hours.

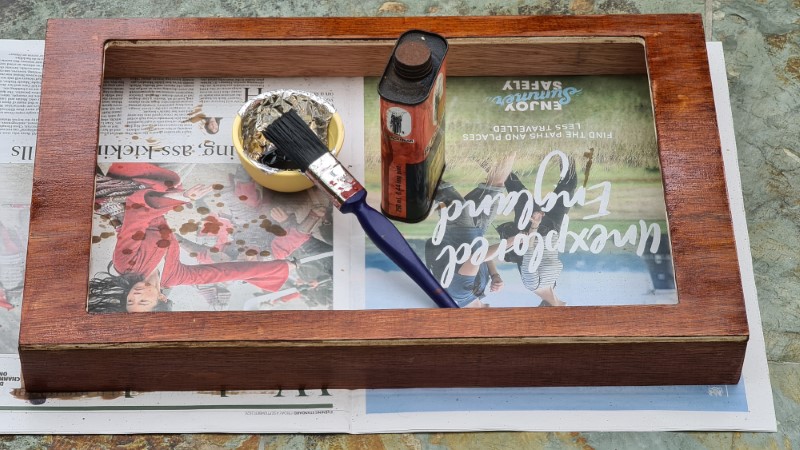
I wanted a darked colour, so got out some old stain and painted it all.
Turns out, you can’t stain the edges of plywood, as the layers that are running perpendicular (the end cuts) will just messily absorb it, so I learnt about adhesive edging - a sort of strip of veneer that you iron on. As it’s wood, it can also be stained.
Finally, I cut a backing board (I spray painted the edges black as was too impatient to stain) and the frame was pretty much done.
The Backend
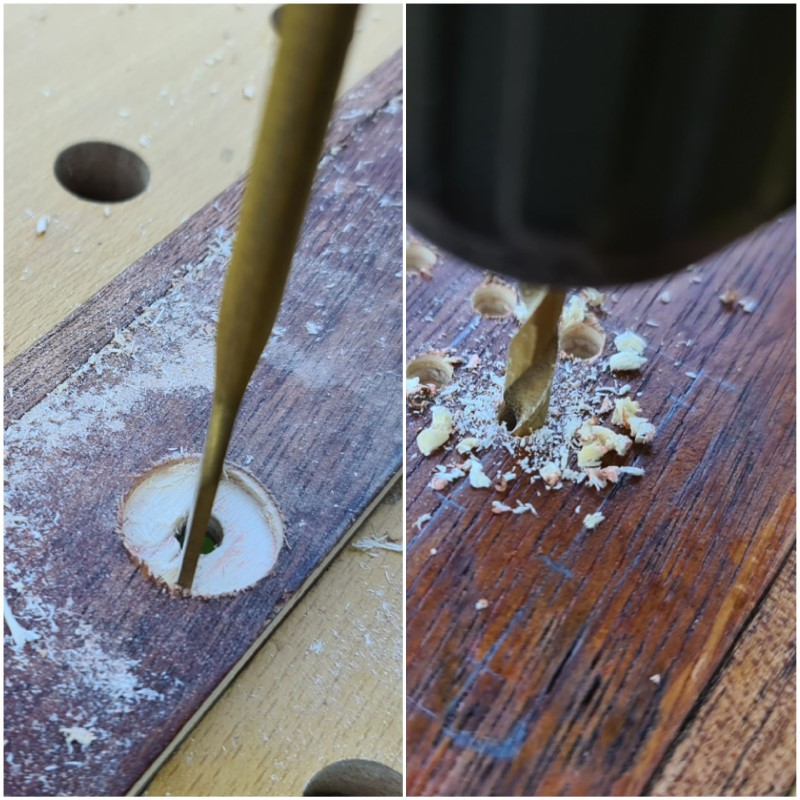
I needed some space behind the monitor so cut out some of the plastic backing with a circular saw on a dremel. Messy, but quick.

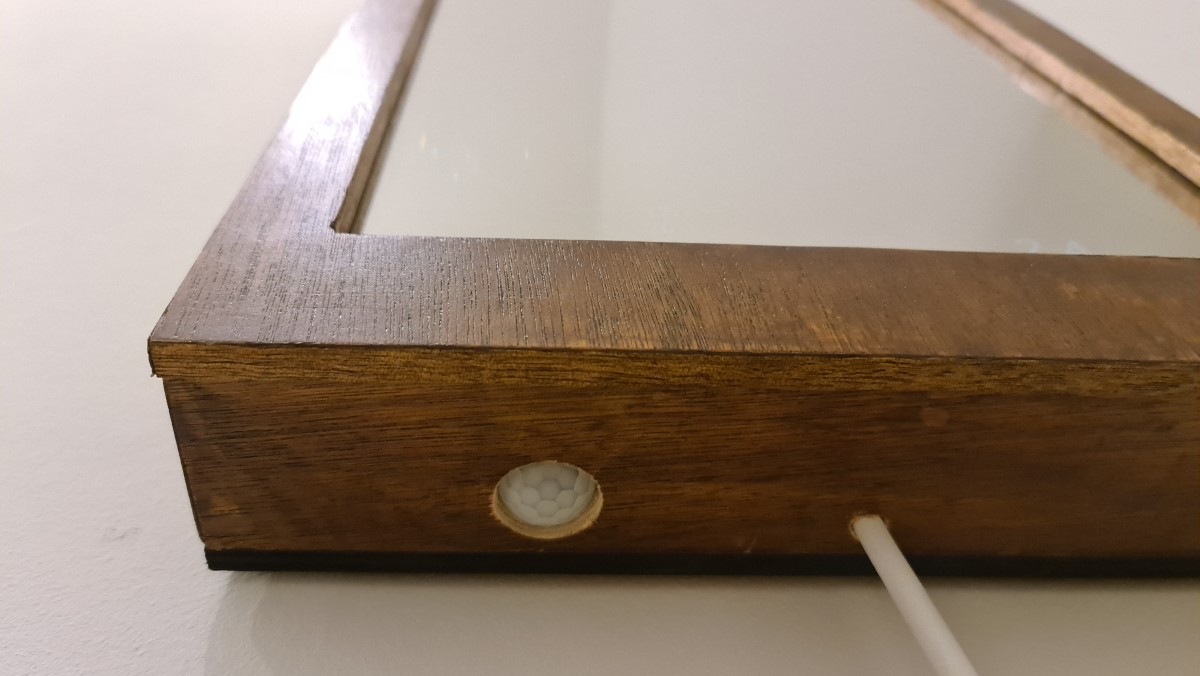
I wanted a little extra functionality on this mirror, so I added in a PIR motion sensor to switch the display off when no one was near it, and a small computer fan that would come on to cool the system if it got too hot. Monitors can get warm after a while, so didn’t want to cook the Pi in a sealed, wooden crate.
I first drilled a hole on the underside of the mirror for PIR (so it’s your legs & feet that trigger the mirror, but at least the sensor isn’t obviously visible) and then a series of small holes for the fan vent. I put the fan on top as I figured heat rises and it would be a good place to extract it. It’s also near the Pi that way.
The PIR sensor in place:
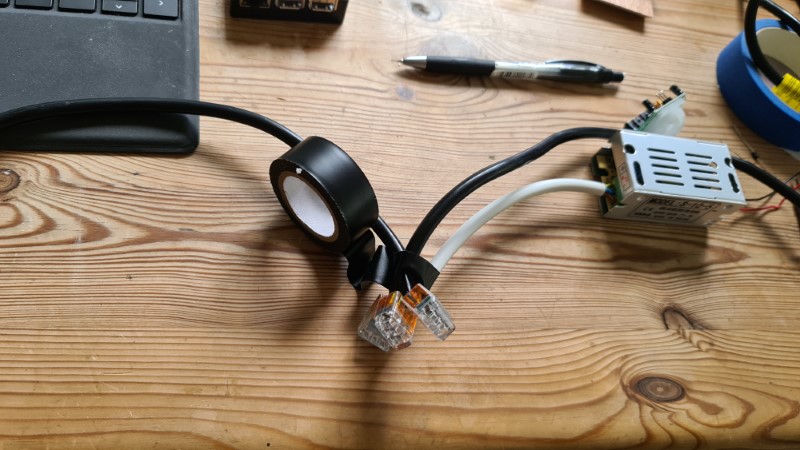
I also needed to power the whole thing. The monitor obviously takes mains voltage and I decided I didn’t want a separate power cable running up to the mirror carrying the 5V the Pi needs. So I found a transformer for the job that would fit in the monitor cut outs. I went for a 5V 2A output, which isn’t ideal for the Pi3B (RaspberryPi.org states is should have 2.5A+), but since I had no real peripherals to power, I hoped it would do. Also the 3A transformer was too thick to fit, so no choice really.
I used quick connecters to splice into the monitor’s power cable - don’t play with mains voltage if you don’t know what you’re doing.
Here’s the layout of the monitor, transformer, Pi, PIR and Fan:
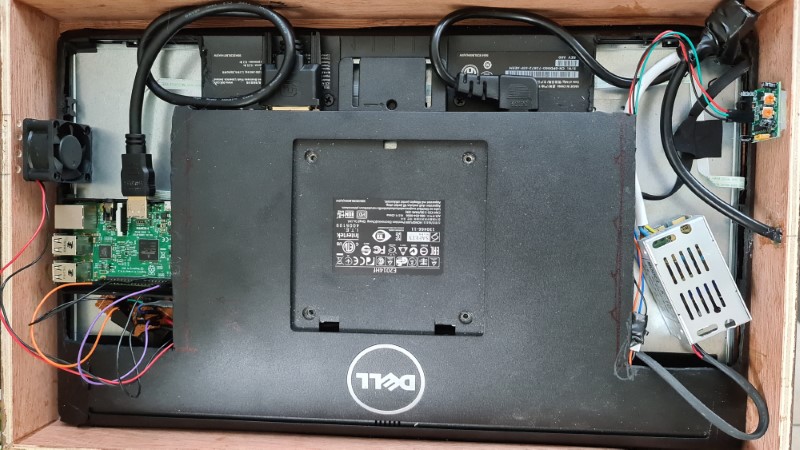
I hot glued it all in place straight to the back of the monitor display - luckily didn’t damage it…
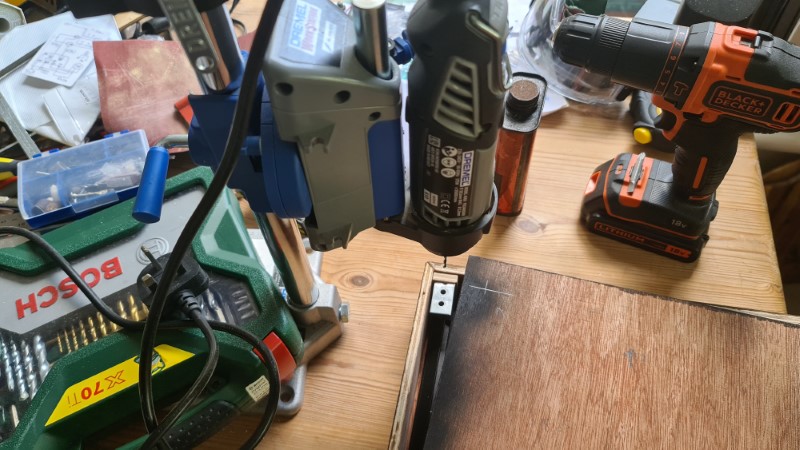
For the backing board to attach, I used the four mounting holes on the monitor as well as installing a few right angle brackets on the inside of the frame. To drill the holes for the bolts to line up with these holes, I used a dremel drill press to first line up with the metal brackets, and then square the backing on and drill straight through.
Software
The software is based on the excellent MagicMirror Electron-based project you can find (here).
The installation instructions are well detailed and as straightforward as copying a dozen commands into the Pi’s command line.
Once runnning, the PM2 process manager can be used to autostart the mirror and from there, the system runs without intervention.
To add modules (and there are many!), it’s a simple git pull and update of the config file.
For mine, I’ve used a mix of online and local services. For weather, I’ve used (this) and for the calendar, (this). More interestingly for displaying data from my home server, there’s a really nice Grafana plugin (here) and this (MQTT module) is very nice and streamlined for displaying data gathered from the network with my Node-Red instance pushing messages via the MQTT broker. This allows pushing of any data, I’m using indoor and outdoor temperatures and current electricity usage.
Back when bus travel was more normal, (this) TFL module displays the next bus arrivals from a local stop very nicely.
Extra Bits
**Expand to see the PIR in action**
For the PIR sensor and the fan, I wrote my own modules as I found the existing PIR module didn’t seem to work particularly well.
For motion sensing, the PIR is a standard HC-SR501, which is good as it can run off the 3.3V pin on the Pi with no worry of the returning data stream somehow having a 5V signal and overloading (although the datasheet states output is at 3.3V anyway).
I wrote a (simple python script) that polls the PIR and if motion is detected, issues a command to stop transmitting over HDMI (this turns the monitor off via its powersave function). From a python call, this command is:
call(["/usr/bin/vcgencmd", "display_power", "0"])
Which is useful if you want to buil anything that will turn the screen off/on - e.g. off at night, on in the day.
The cooling fan would draw too much current off the Pi’s 5V pin, so I gave it power straight from the 5V output of the transformer and used an NPN transistor to turn it on and off with the Pi.
A useful Raspberry Pi command for grabbing the current CPU temperature in a python script is:
open("/sys/class/thermal/thermal_zone0/temp", "r")
And this is used in the (python script I’ve written here) to determine whenther the fan should be on or off every 10 seconds.
It works smoothly, and if I trigger the monitor enough times to keep it on for a few minutes, the Pi occasionally trips the fan and drops back to 60°C.
Both of the above scripts were then added to cron to run at reboot.
Complete
This was a fun project, and I learned a lot more about wood than silicon, but I know many others have just procured ready-made frames and made them fit monitors, so that would be an easier route for the less inclined.