3D SLA Printer Remote Control Centre
3D printing is a great tool, but needs some observation and temperature regulation. Remotely.
After using filament printers about 10 years ago, I recently when down the SLA route - the printers using a vat of UV-curing resin to extrude structures of high resolutions, without the structural weaknesses of layers of filament.
I’ve been using the Elegoo Mars 2, which is a very cost-effective way to set up a small printing station in the corner of a (well-ventilated) room - or in my case garage.
During summer, this works fine, however a key determiner of success is the temperature of the resin and FEP film (a transparent sheet of flexible plastic that UV light can shine through, but prints shouldn’t be able to stick to as they cure). The ideal temperature for this kind of printing is around 25°C, and with the printer being in a garage, this requires some external ‘help’.
When a print gets going, it’s also important to keep an eye on progress, as you want to abort it as soon as a failure occurs to save time, resin and a lot of cleanup afterwards.
So I set about building a remote monitoring device with the following requirements:
1) A remote camera that could show how the print was doing
2) A temperature sensor that could tell me what the resin temperature is at
3) The ability to turn on/off a space heater that can bring the temperature up if needed
For this, I settled on the following part list:
-
ESP32-CAM - a wifi-enabled microcontroller (~Arduino) with built in camera and flash LED
- MLX90614 - a contactless temperature sensor, using IR to detect temperature remotely, here
- 433MHz RF Transmitter - I used the superheterodyne variant, like this one

In total, this came to about £15, and it could be halved if you’re willing to wait longer for delivery.
In addition, I have an Amazon basics space heater and an old RF remote control plug socket (like these) to which I’ve already decoded the on and off codes using a simple RF receiver and an arduino. This makes it much easier to interface with mains-powered equipment as you don’t have to start wiring relays, and you can keep the whole thing remote (and re-use the components for something else later).
I should mention that there is an excellent opensource project called OctoPrint that uses a Raspberry Pi based system to monitor printing remotely and issue commands to the printer. However, at the time of writing, SLA printer support was a little lacking and I wanted to mostly learn how to interface with the ESP32-CAM and IR sensors.
Wiring & Assembly
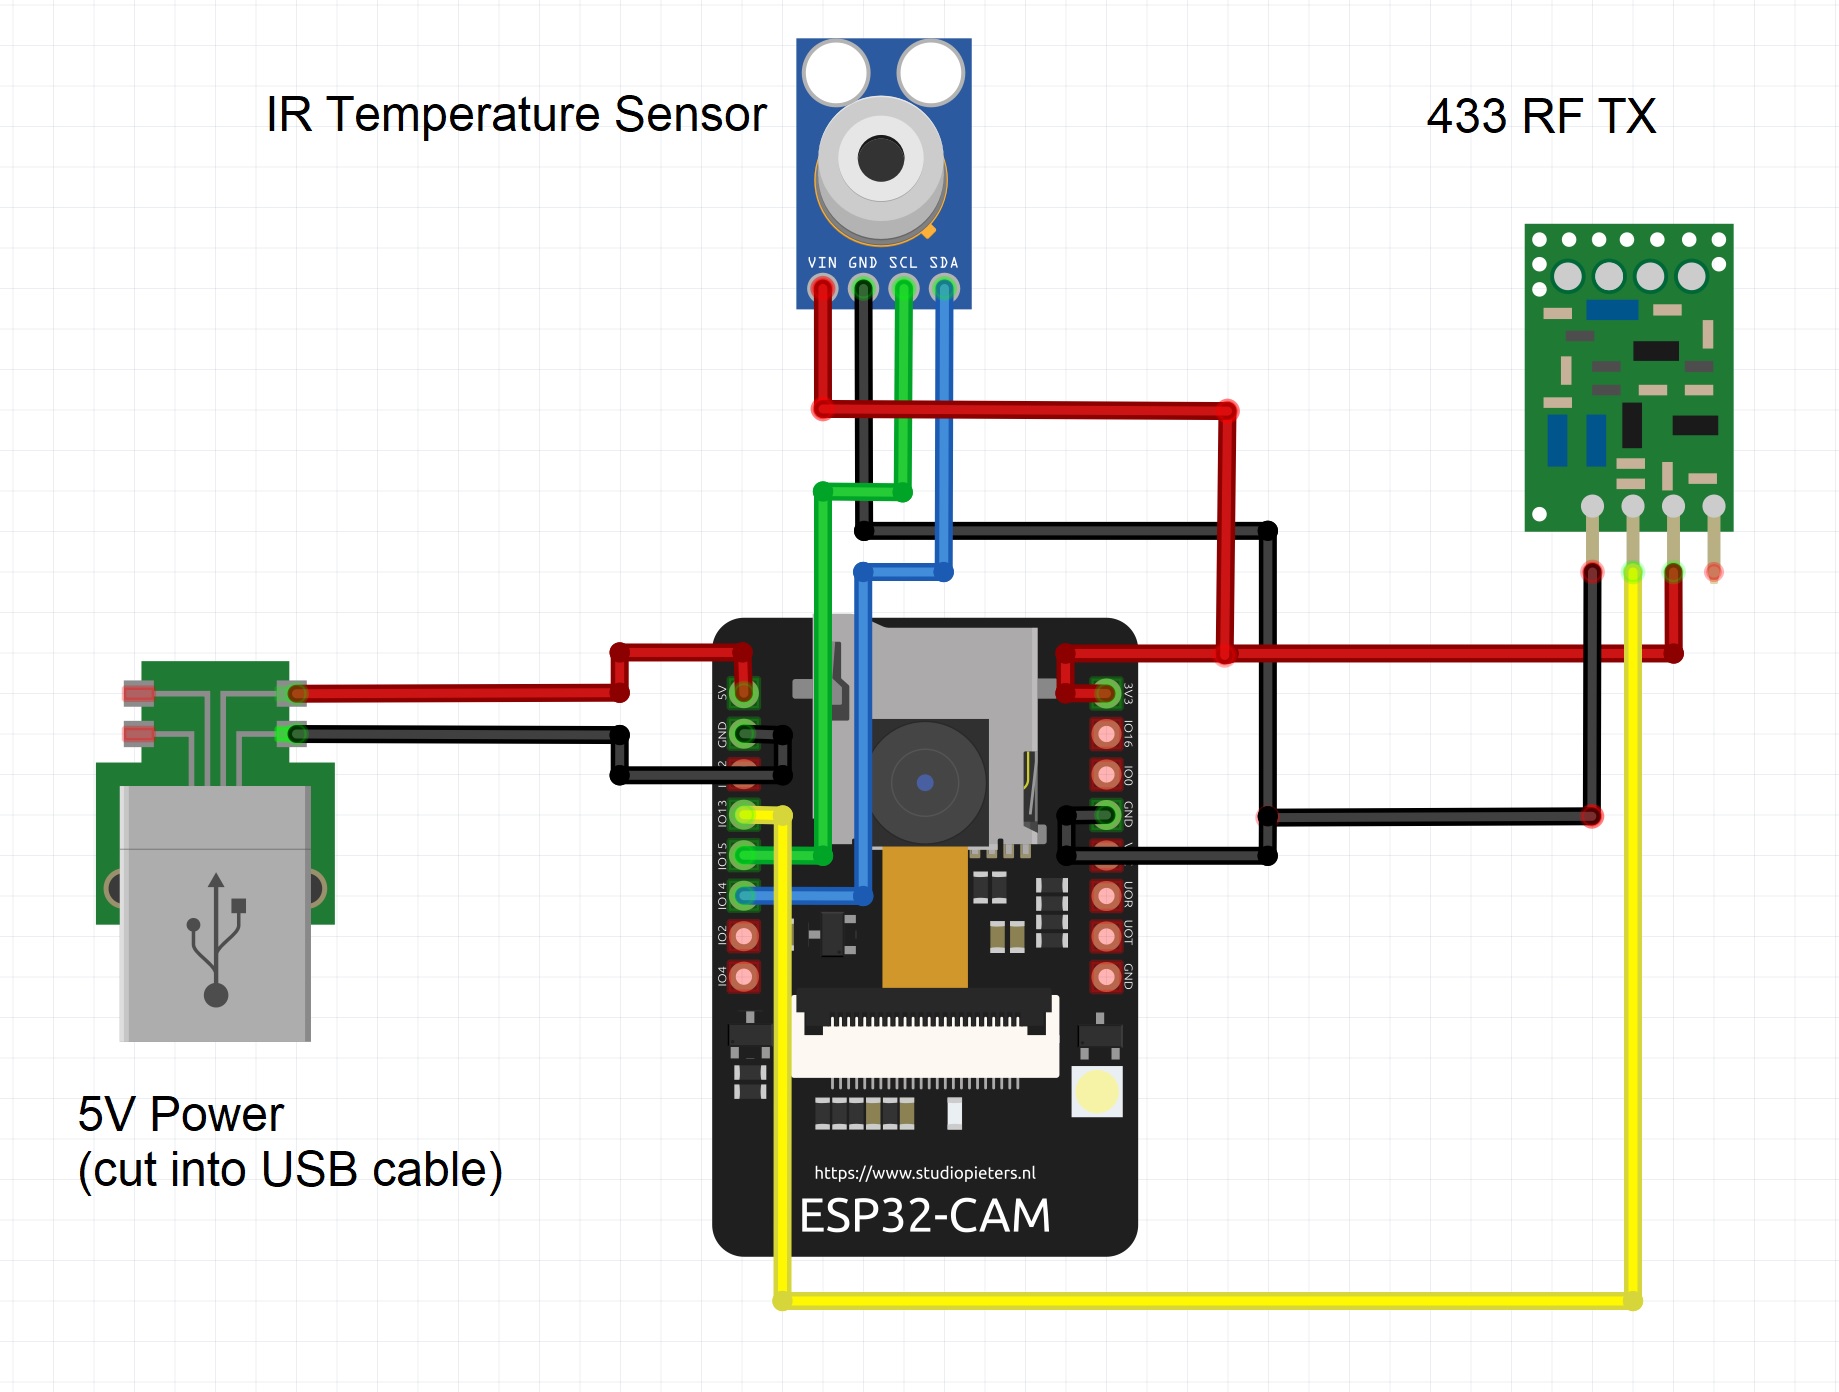
I cut the end off an old USB cable and soldered the ESP32 5V and Ground pins to the red and black wires. This provides easy power via a USB charger.
The temp sensor is I2C, so you can use any GPIO pins and configure them in the code. When choosing GPIOs, be wary of what’s already dedicated to using the camera and flash (flash LED is on GPIO4 btw, and is needed here as the printer is kept in the dark). There are also pins reserved for the SD card reader on the ESP32, but we’re not using that so can steal them for the IR or RF modules.
I soldered the whole thing onto a small piece of perf board to keep the form as small as possible, with an antenna attached to the RF Transmitter.

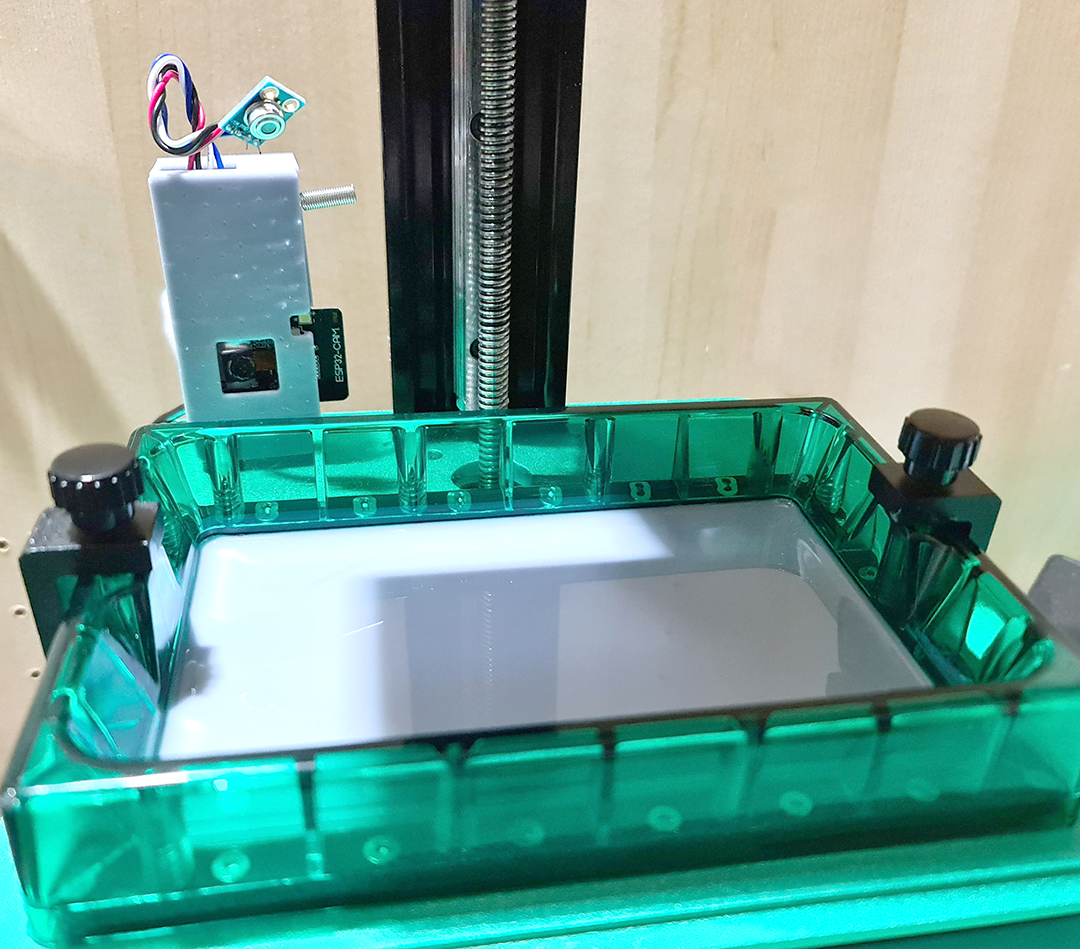
As the contactless temperature sensor will need to be moved around to point at the resin, I added slightly longer wire to give it positionability.
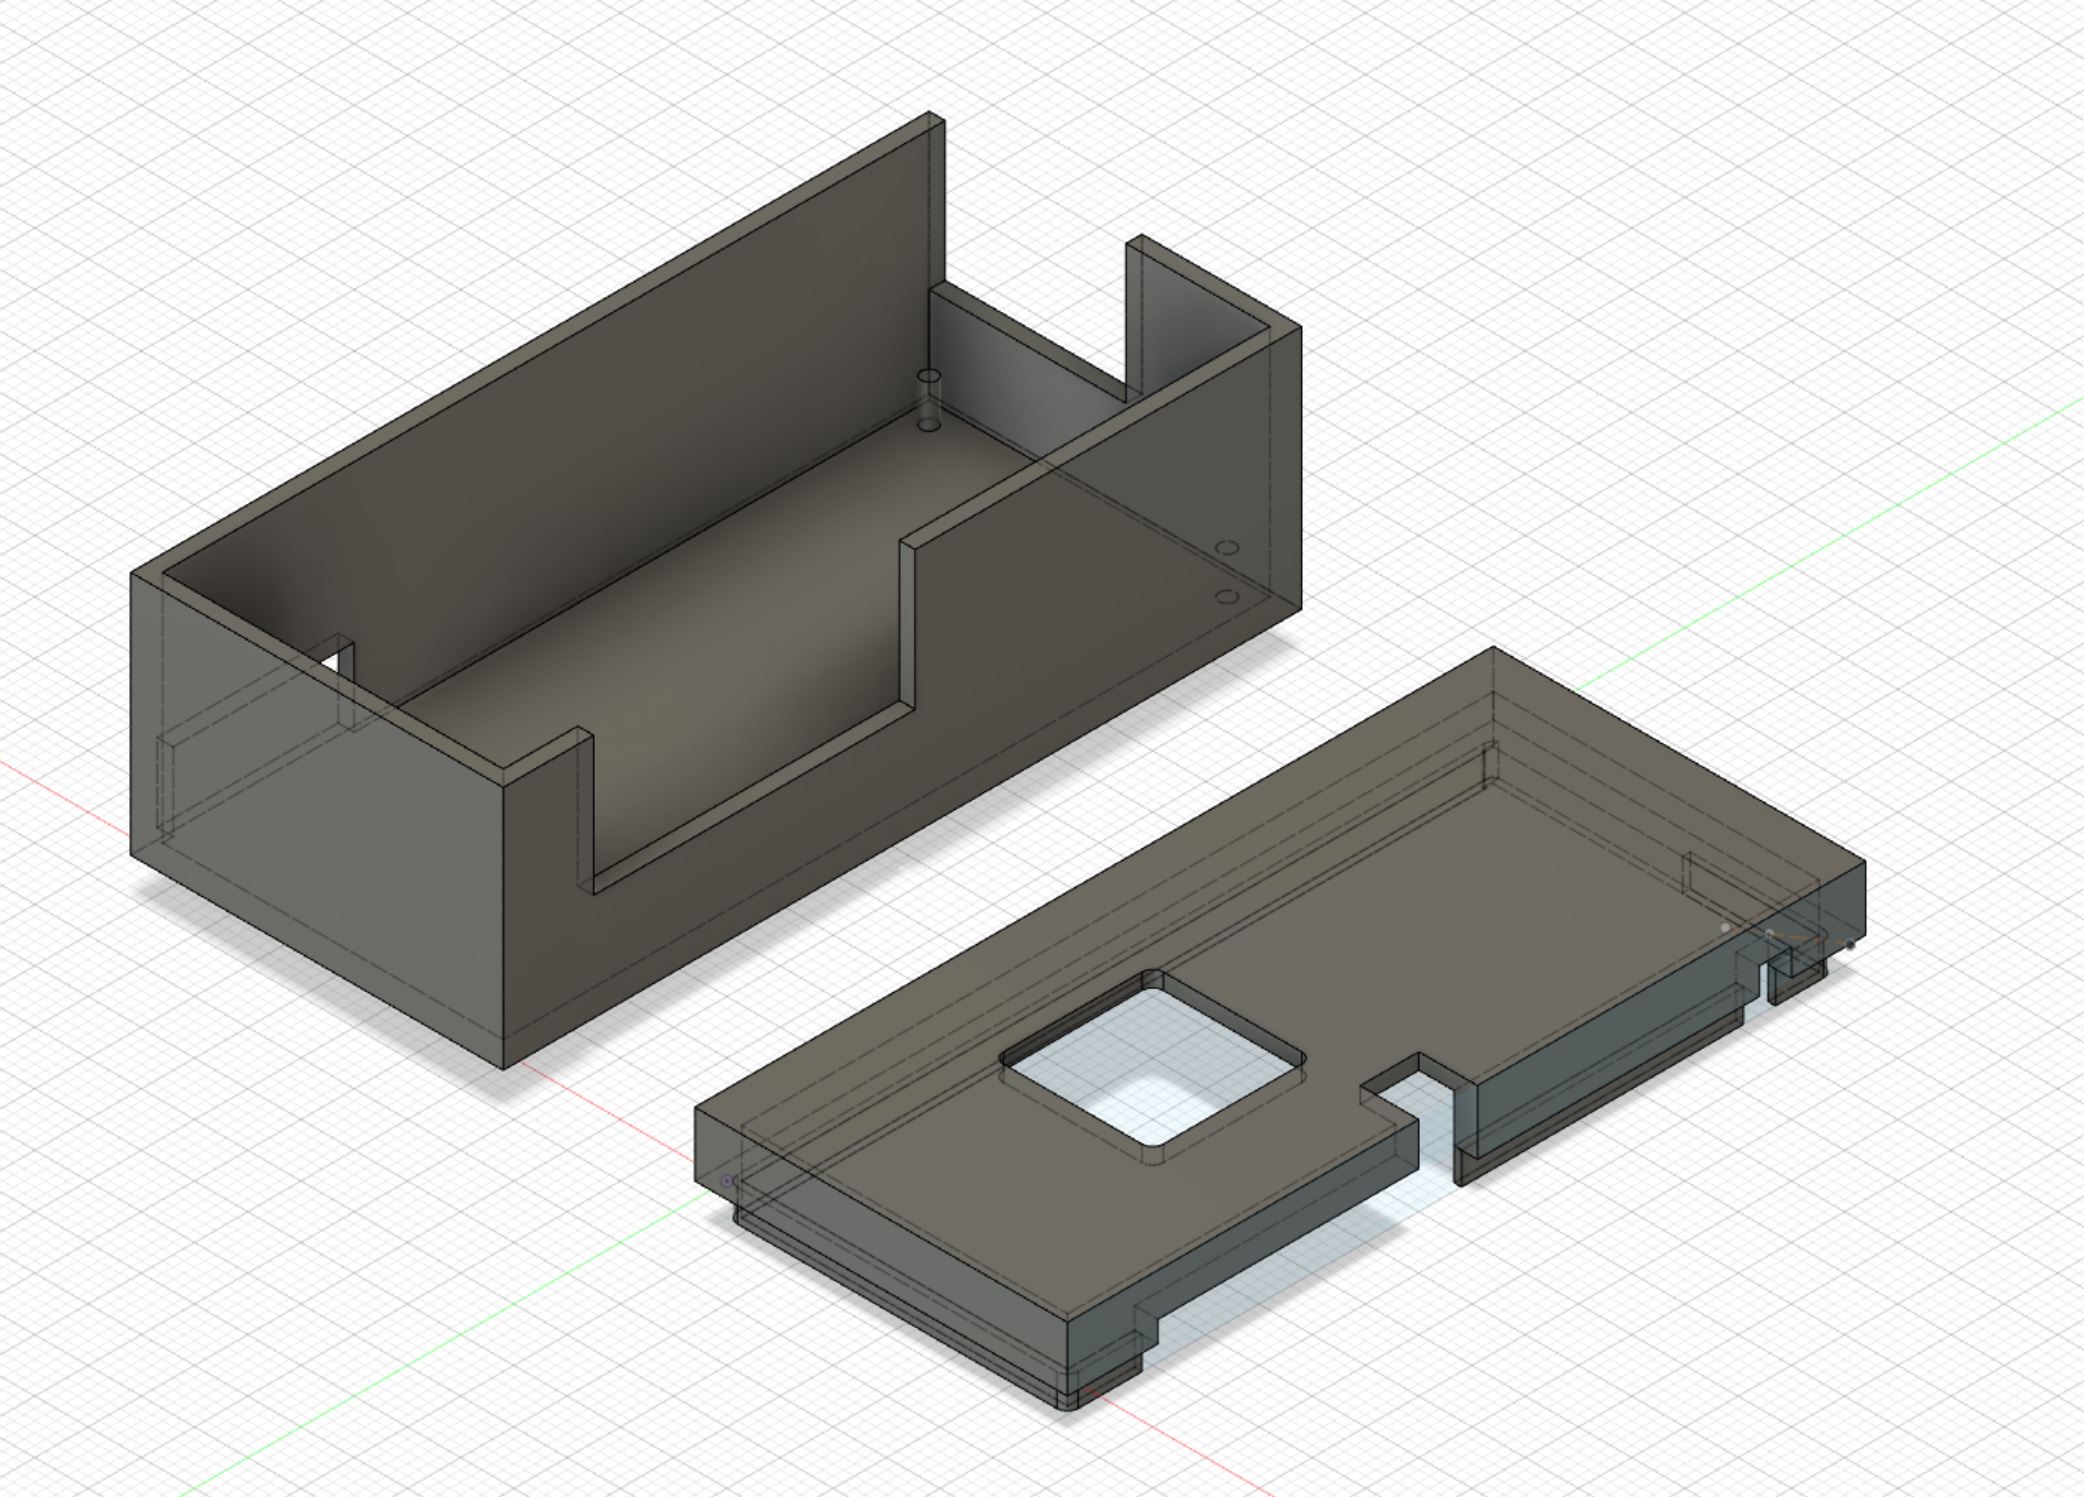
Since it’s being used on a printer, I knocked up a case in Fusion360, mainly to protect it from resin splashes.
Code
The code is available here.
It’s a straightforward connection to WiFi and MQTT server with callbacks based on the commands needed to control it.
The inputs are to take picture or turn the heater on and off, while the outputs are sending an image over MQTT (this is great for ease of use, but limits file size) as well as reporting ambient and resin temperatures every minute.
There is a function for taking the picture that sets the flash LED pin high to snap the image and then low to turn it off.
I brought this into Node Red and knocked up a dashboard to control the camera and heater, and to check the temperature readings.
Camera Tuning
In order for the camera to focus close up, the focus needs to be adjusted by rotating the lens. My ESP-32-CAM board had a big glue blob holding the focus and I had to do a lot of scraping and twisting to get it free, but I’ve had other boards where you can break the seal with little force.
**Expand to see lens rotation**
I also had to add a delay in the code so the flash was on for 300ms before the camera took an image, otherwise the ESP didn’t seem to have time to correctly expose the image without blowing it out.
You can see here a screen recording off my phone with the NodeRed controls/image at the top, with a video at the bottom of the ESP taking a picture with the flash.
**Expand to see camera with flash in action**
Finally, I added the option in the dashboard to save the images locally to convert to a timelapse if desired. The images aren’t pretty, but you can see quickly if a print is failing or is even present on the buildplate.
**Expand to see timelapse**
Temperature Monitoring
In NodeRed, it’s simple to output the temperature readings to a InfluxDB and plot them in Grafana. This adds a useful logging function of how temperatures can fluctuate. Interestingly, the photocuring of resin is exothermic, and so once the print has started, the heater is no longer needed and the temperature is self-sustaining.
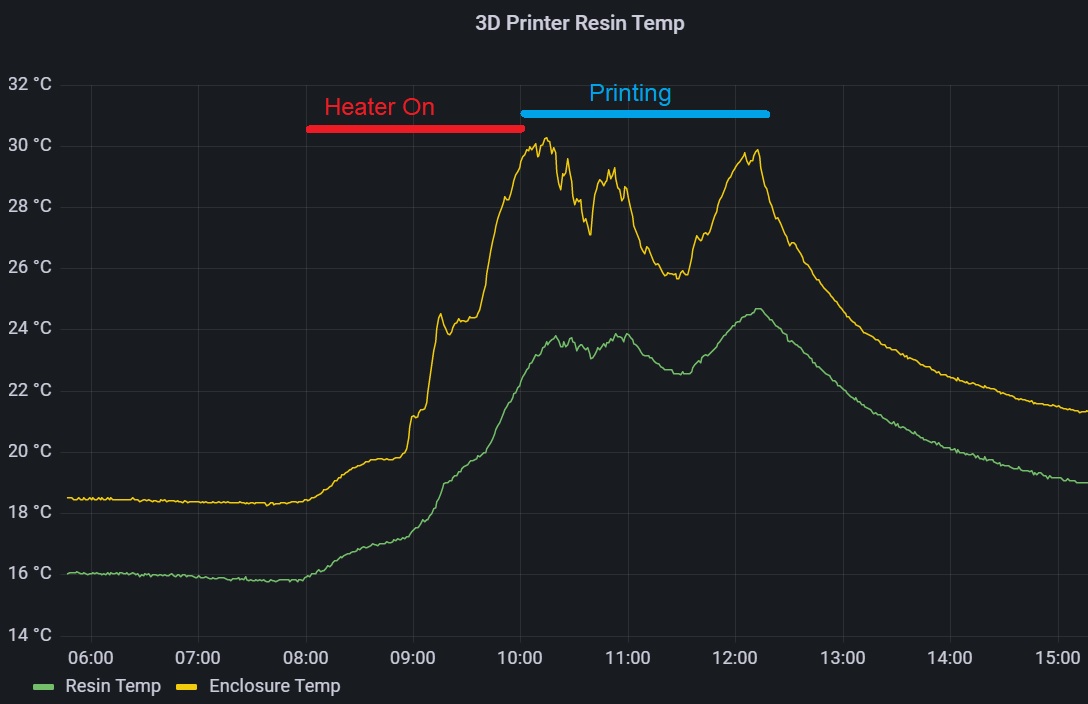
It also straightforward in NodeRed to add a thermostat function, whereby if the temperature of the resin exceeds 27°C, the heater shuts off automatically. I also added a notification via Telegram to my phone if the ambient temperature exceeds 30°C in case the heater has failed to switch off.